Hello World
The basic way for integrating VContainer into your application is:
- Create a component that inherits
LifetimeScopein your scene. It has one container and one scope. - Register dependencies with C# code in a subclass of LifetimeScope. This is the composition root.
- When playing scene, LifetimeScope automatically build Container and dispatch to the own PlayerLoopSystem.
Normally, a "scope" is repeatedly created and destroyed during the game. LifetimeScope assumes this and has a parent-child relationship.
1. Write a class that depends on other classes
Let's say Hello world.
namespace MyGame
{
    public class HelloWorldService
    {
        public void Hello()
        {
            UnityEngine.Debug.Log("Hello world");
        }
    }
}
2. Define composition root
Next, let's write a setting that can auto-wiring the class.
- Right click in a folder within the Project Tab and Choose Create -> C# Script.
- Name it
GameLifetimeScope.cs.
VContainer will automatically overwrite the default template for C# scripts ending in *LifetimeScope.
You instruct builder and register the class above.
using VContainer;
using VContainer.Unity;

namespace MyGame
{
    public class GameLifetimeScope : LifetimeScope
    {
        protected override void Configure(IContainerBuilder builder)
        {
+            builder.Register<HelloWorldService>(Lifetime.Singleton);
        }
    }
}
VContainer always requires a Lifetime argument explicitly. This gives us transparency and consistency.
3. Create GameObject attached your LifetimeScope
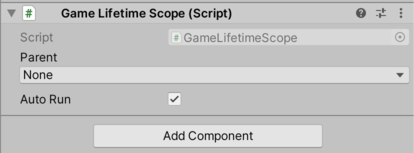
Right Click inside the Hierarchy tab and select Create Empty. And name GameLifetimeScope it.
Then attach the Component created above.
4. How to use your new HelloWorldService ?
Registered objects will automatically have dependency injection. Like below:
using VContainer;
using VContainer.Unity;

namespace MyGame
{
    public class GamePresenter
    {
        readonly HelloWorldService helloWorldService;

        public GamePresenter(HelloWorldService helloWorldService)
        {
            this.helloWorldService = helloWorldService;
        }
    }
}
And let's also register this class.
builder.Register<HelloWorldService>(Lifetime.Singleton);
+ builder.Register<GamePresenter>(Lifetime.Singleton);
5. Execute your registered object on PlayerLoopSystem
To write an application in Unity, we have to interrupt Unity's lifecycle events. (Typically MonoBehaviour's Start / Update / OnDestroy / etc..)
Objects registered with VContainer can do this independently of MonoBehaviour. This is done automatically by implementing and registering some marker interfaces.
using VContainer;
using VContainer.Unity;

 namespace MyGame
 {
-    public class GamePresenter
+    public class GamePresenter : ITickable
     {
         readonly HelloWorldService helloWorldService;

         public GamePresenter(HelloWorldService helloWorldService)
         {
             this.helloWorldService = helloWorldService;
         }

+        void ITickable.Tick()
+        {
+            helloWorldService.Hello();
+        }
     }
 }
Now, Tick() will be executed at the timing of Unity's Update.
As such, it's a good practice to keep any side effect entry points through the marker interface.
(By design, for MonoBehaviour is enough to use Start / Update etc. The marker interface of VContainer is a function to separate the entry point of domain logic and presentation logic. )
We should register this as running on Unity's life cycle events.
- builder.Register<GamePresenter>(Lifetime.Singleton);
+ builder.RegisterEntryPoint<GamePresenter>();
- RegisterEntryPoint<GamePresenter>() is an alias to register interfaces related to Unity's PlayerLoop event.
- Similar to Register<GamePresenter>(Lifetime.Singleton).As<ITickable>()
- Registering lifecycle events without relying on MonoBehaviour facilitates decoupling of domain logic and presentation !
If you have multiple EntryPoints, you can also use the following declaration as grouping.
builder.UseEntryPoints(Lifetime.Singleton, entryPoints =>
{
    entryPoints.Add<GamePresenter>();
    // entryPoints.Add<OtherSingletonEntryPointA>();
    // entryPoints.Add<OtherSingletonEntryPointB>();
    // entryPoints.Add<OtherSingletonEntryPointC>();
})
This makes it clearer that EntryPoints are given special treatment by design.
6. Inversion of Control (IoC)
It typically calls logic in response to events such as user input.
Consider the following View Component.
using UnityEngine.UI;
public class HelloScreen : MonoBehaviour
{
    public Button HelloButton;
}
In normal Unity programming, you embed logic calls in HelloScreen, but if you're using DI, you can separate HelloScreen and any control flow.
namespace MyGame
{
-    public class GamePresenter : ITickable
+    public class GamePresenter : IStartable
     {
         readonly HelloWorldService helloWorldService;
+        readonly HelloScreen helloScreen;

         public GamePresenter(
             HelloWorldService helloWorldService,
+            HelloScreen helloScreen)
         {
             this.helloWorldService = helloWorldService;
+            this.helloScreen = helloScreen;
         }

+        void IStartable.Start()
+        {
+            helloScreen.HelloButton.onClick.AddListener(() => helloWorldService.Hello());
+        }
     }
}
By doing this, we succeeded in separating the domain logic / control flow / view component.
- GamePresenter: Responsible only for Control Flow.
- HelloWorldService: Responsible only for the functionality that can be called anytime, anywhere
- HelloScreen: Responsible only for View.
In VContainer, you need to register the dependent MonoBehaviour. Don't forget to register HelloScreen.
    public class GameLifetimeScope : LifetimeScope
    {
+       [SerializeField]
+       HelloScreen helloScreen;

        protected override void Configure(IContainerBuilder builder)
        {
            builder.RegisterEntryPoint<GamePresenter>();
            builder.Register<HelloWorldService>(Lifetime.Singleton);
+           builder.RegisterComponent(helloScreen);
        }
    }